Your first scan
This is the end-to-end walkthrough for the dashboard: sign in, start a scan, watch it run live, and read the report. It takes a few minutes and, during launch, costs nothing. If you want to drive scans from code instead, jump to the REST API or the MCP server.
1. Sign in
Open app.anthrion.xyz and choose CONNECT.

Sign in with an email or a wallet — whichever you prefer:
- Email — enter your address and we send a one-time code to your inbox. Paste the code and you are in. There is no password to manage.
- Wallet — connect a wallet and approve the sign-in. We never ask for a private key or seed phrase, and ANTHRION takes no custody of your funds.

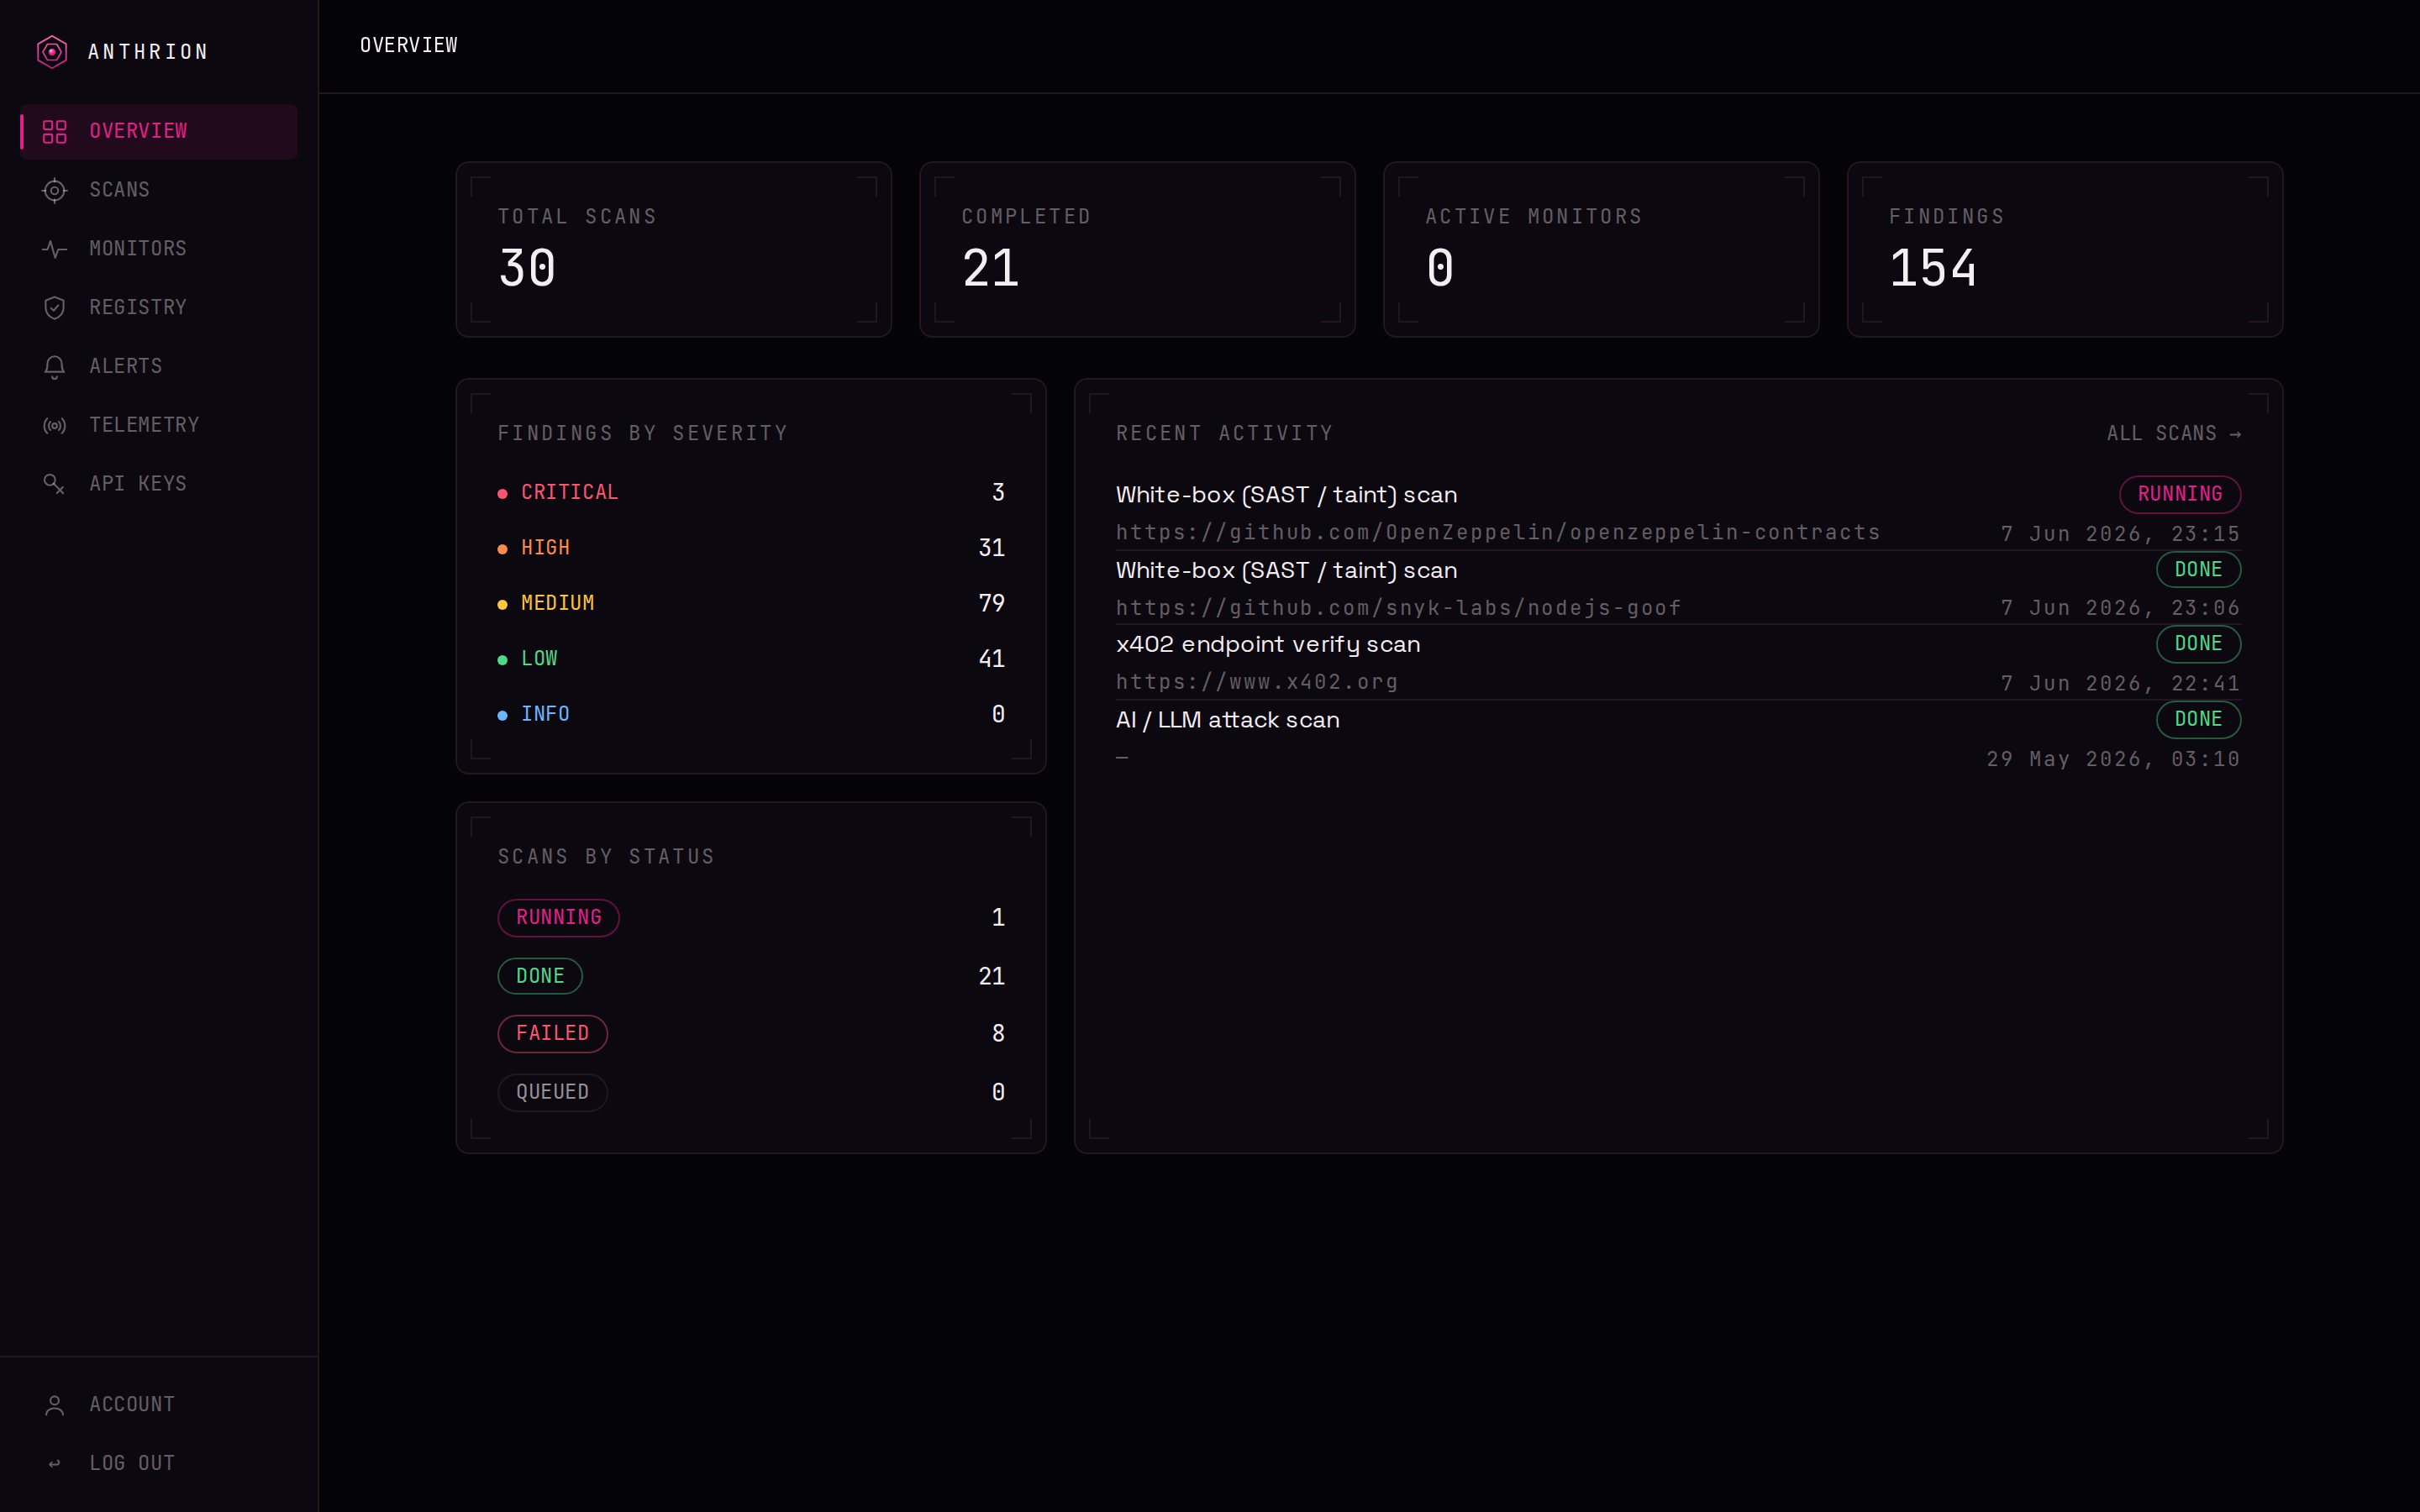
2. Get your bearings — the Overview
After signing in you land on the Overview. It is your account at a glance: findings grouped by severity, scans grouped by status, and your most recent activity. The left sidebar is how you move between scans, the endpoint registry, and your settings.
3. Start a scan
Choose New scan (from the sidebar or the Overview). Pick a scan type, then fill in its target.
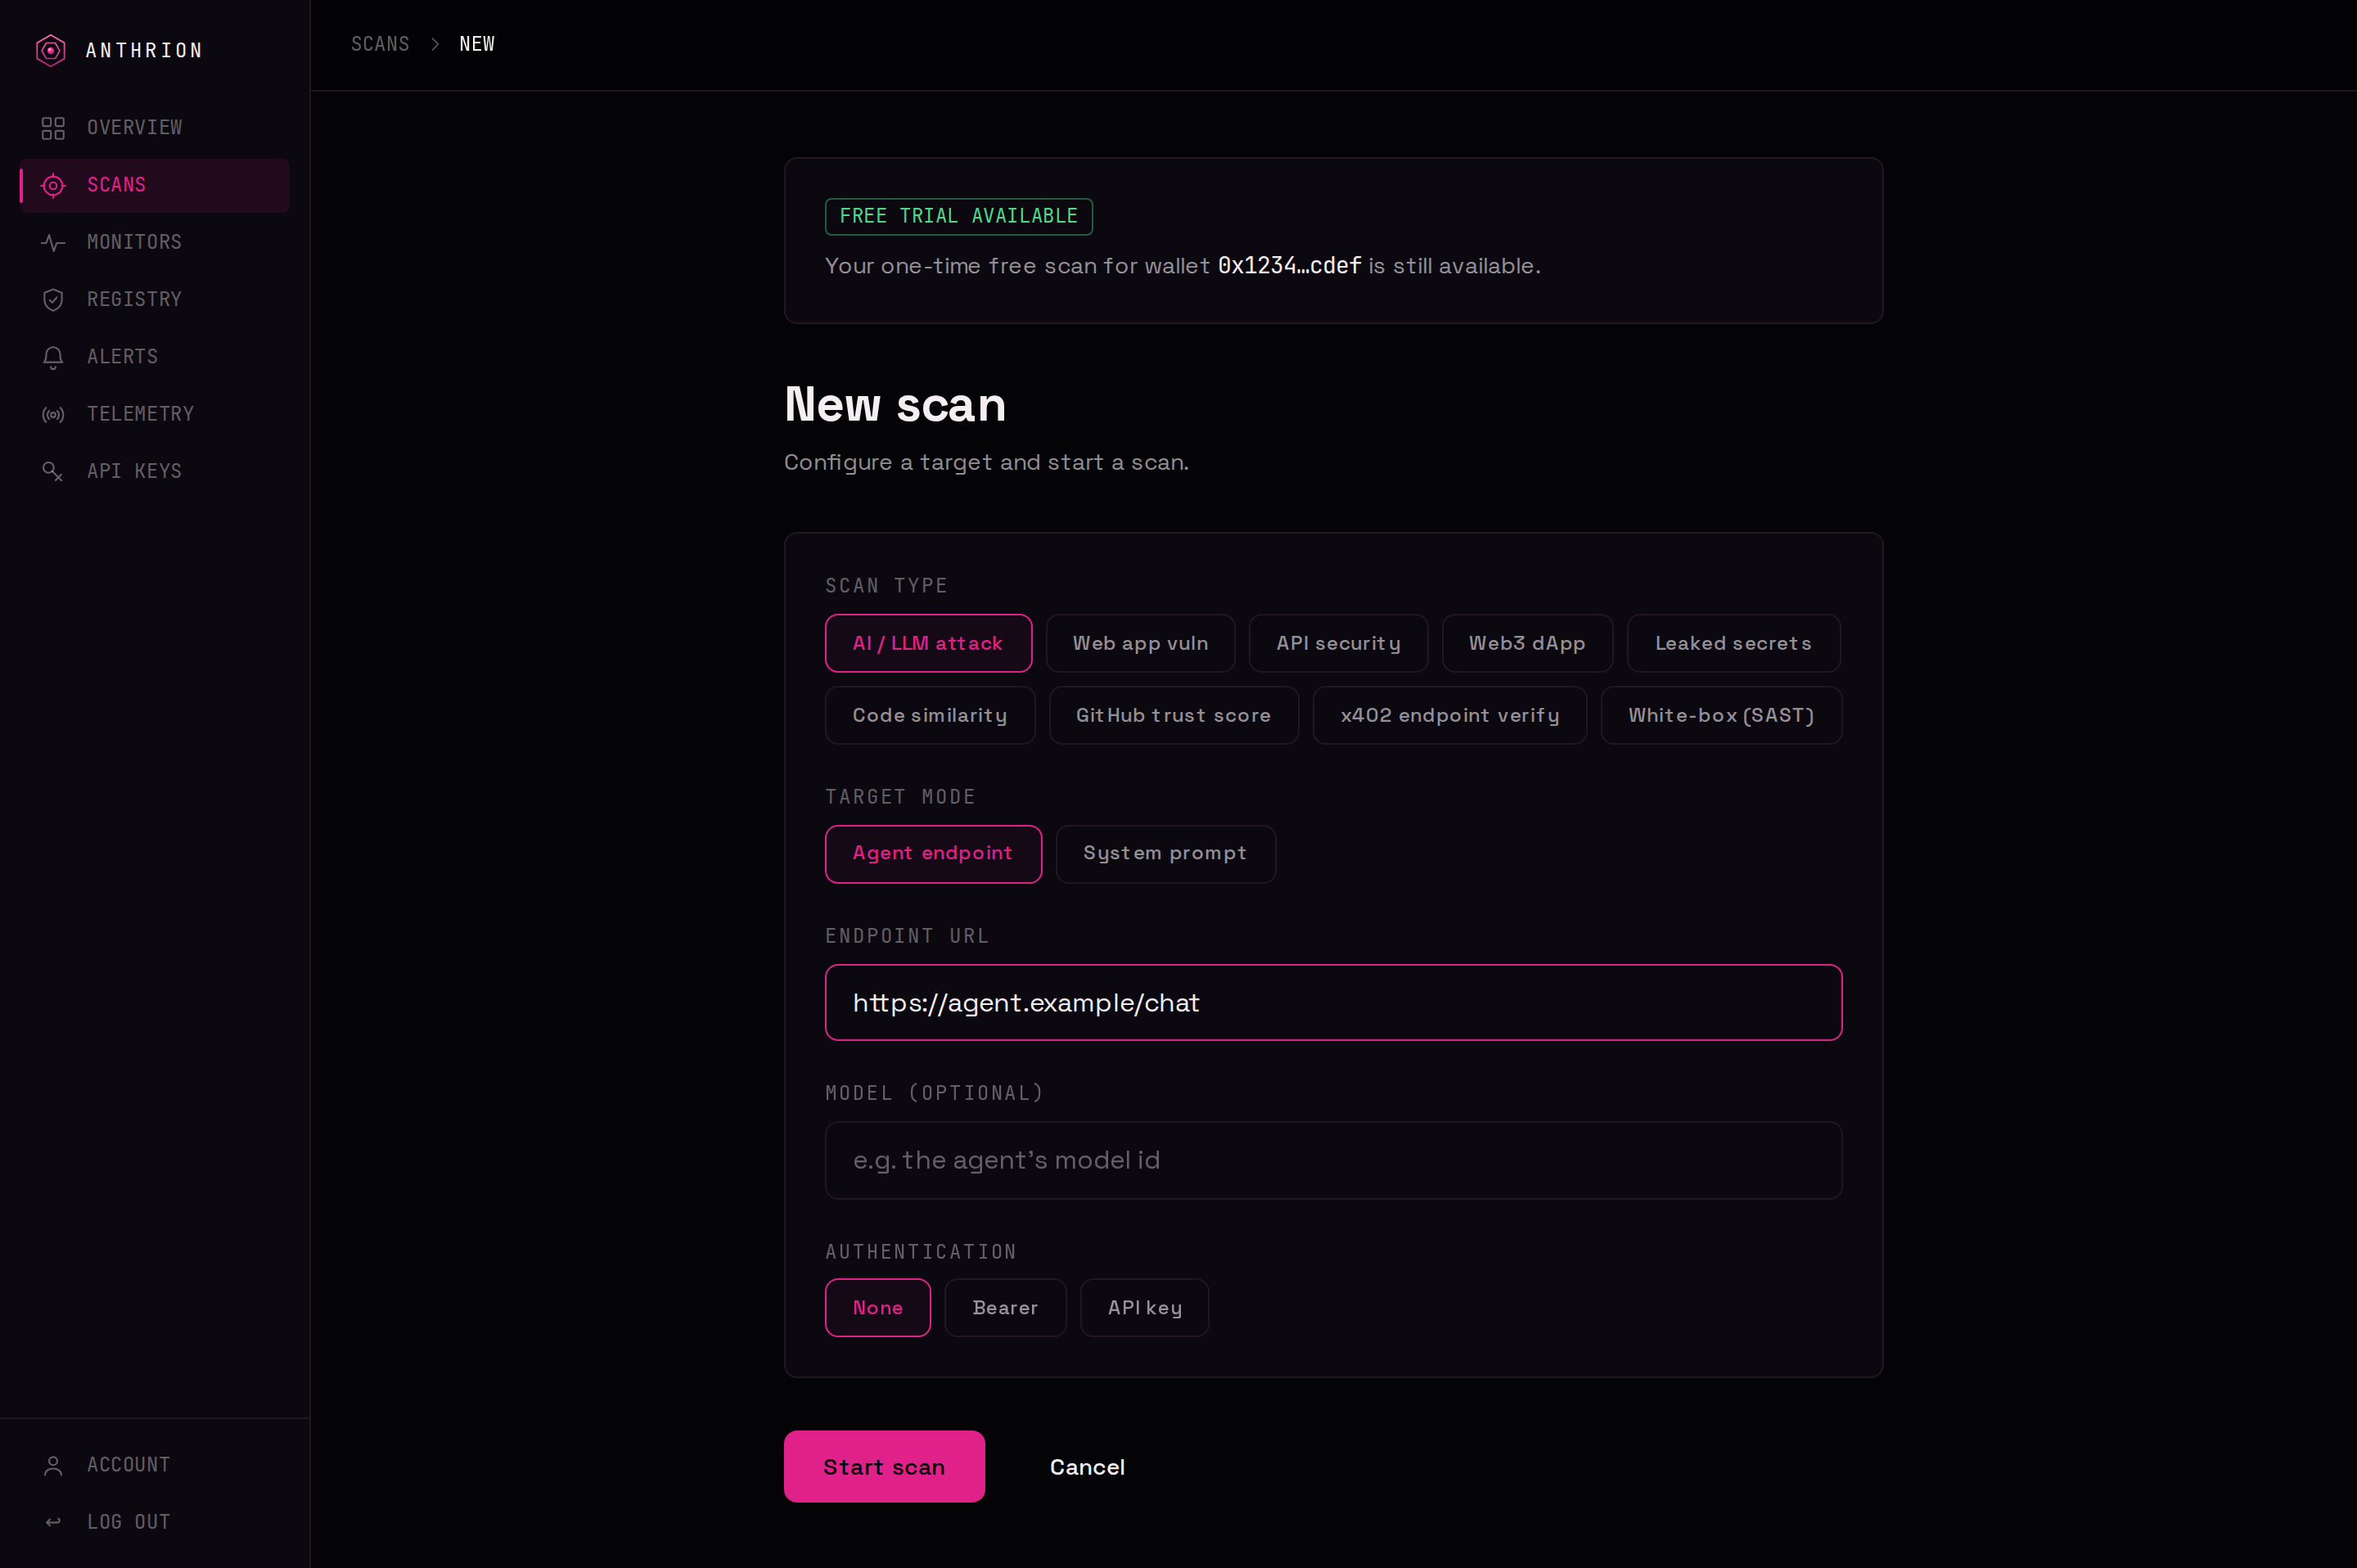
The scan type decides what ANTHRION inspects and what kind of target it expects:
| You want to test | Pick | Target you provide | |---|---|---| | An AI agent / LLM | AI / LLM attack | A live agent endpoint, or a pasted system prompt | | A live website | Web app vuln | A site URL (single page or a multi-page crawl) | | An API | API security | An endpoint URL, or a pasted OpenAPI/Swagger spec | | A Web3 dApp | Web3 dApp | A dApp URL + chain (read-only — never signs) | | Code for secrets | Leaked secrets | A public GitHub repo, or pasted code | | Copied / forked code | Code similarity | A public GitHub repo | | A repo's trustworthiness | GitHub trust score | A public GitHub repo | | A paid (x402) endpoint | x402 endpoint verify | An endpoint URL (read-only — never pays) | | Source code, statically | White-box (SAST) | A public GitHub repo, or pasted code |
See Scan types for exactly what each one detects. When the target is set, choose Start scan.
Safe targets
Only scan something you own or are authorised to test. For trying things out, use a target built for it — for example the public, intentionally-vulnerable test site testphp.vulnweb.com, or one of your own staging URLs or public repositories.
4. Watch it run, live
You are taken straight to the scan, where progress streams live. The status moves through
the lifecycle — QUEUED, then RUNNING — and findings appear the moment
they land, so a high-severity issue surfaces early rather than only at the end.
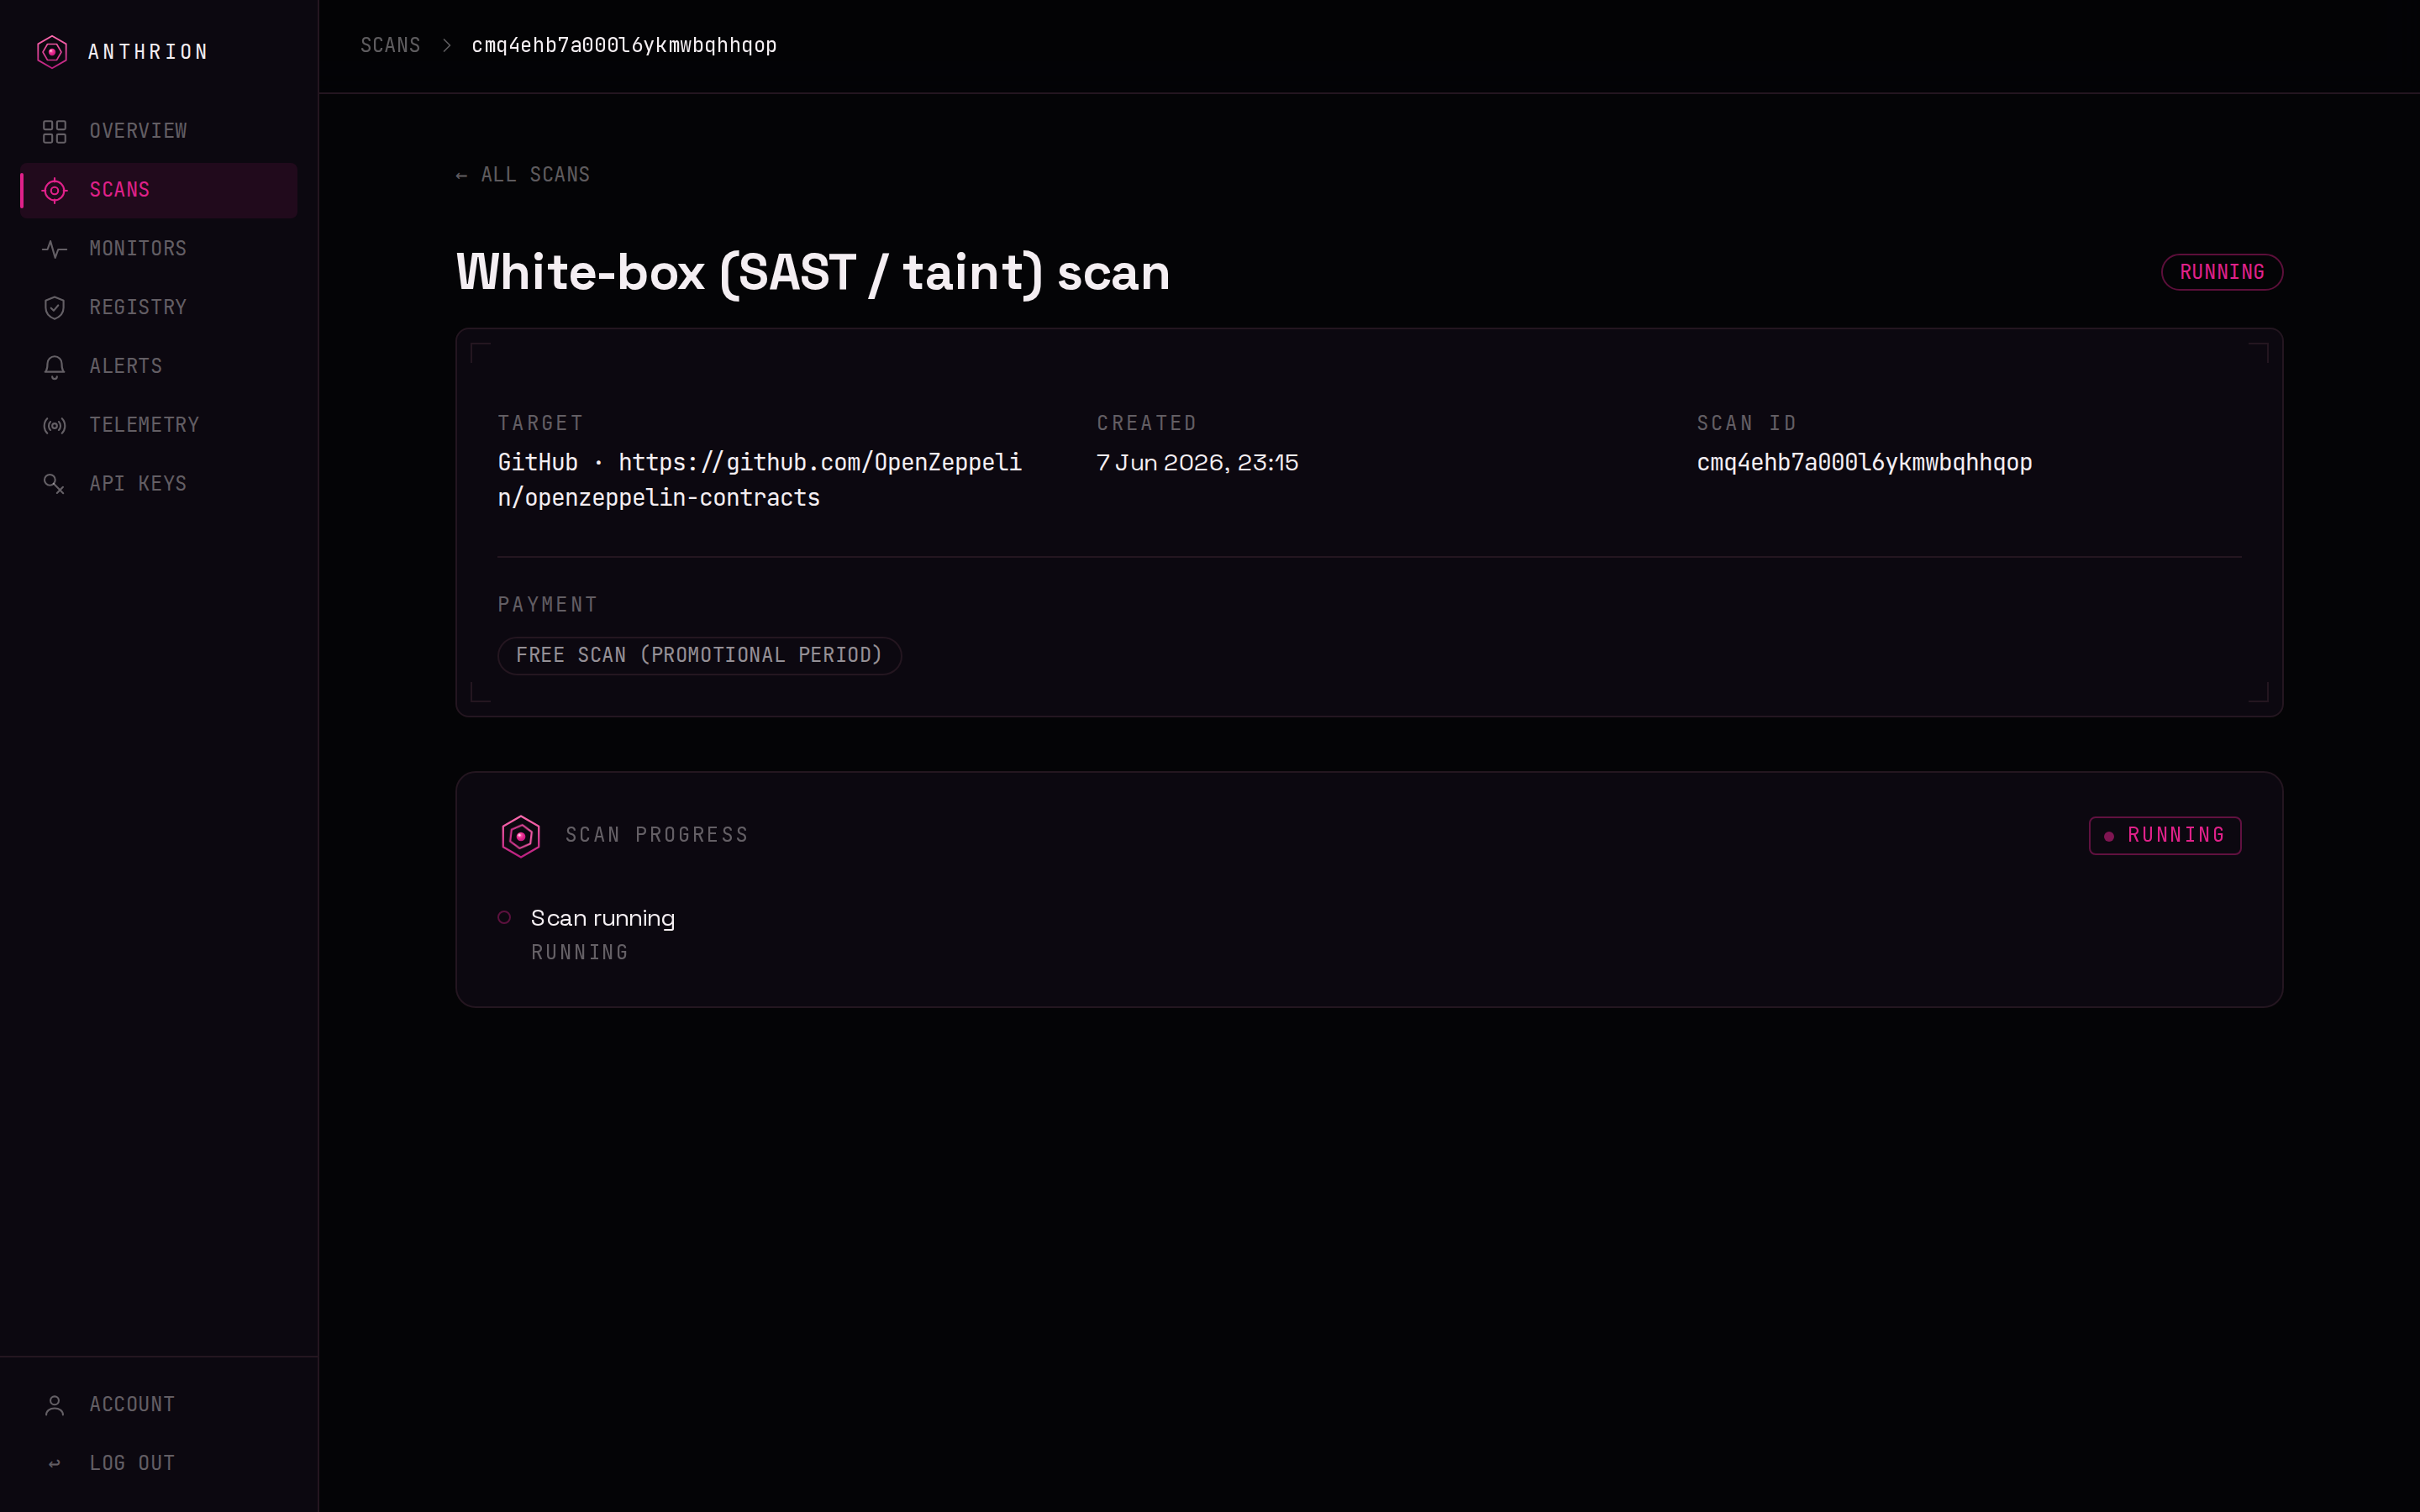
You do not have to wait at the page — the scan keeps running, and you can come back to it from Scans at any time. More on this in Real-time results.
5. Read the report
When the scan reaches DONE, the page becomes the report: a severity summary at the top,
then every finding in full. Each finding follows the same normalized model —
so a finding from an AI scan and one from a code scan read the same way.
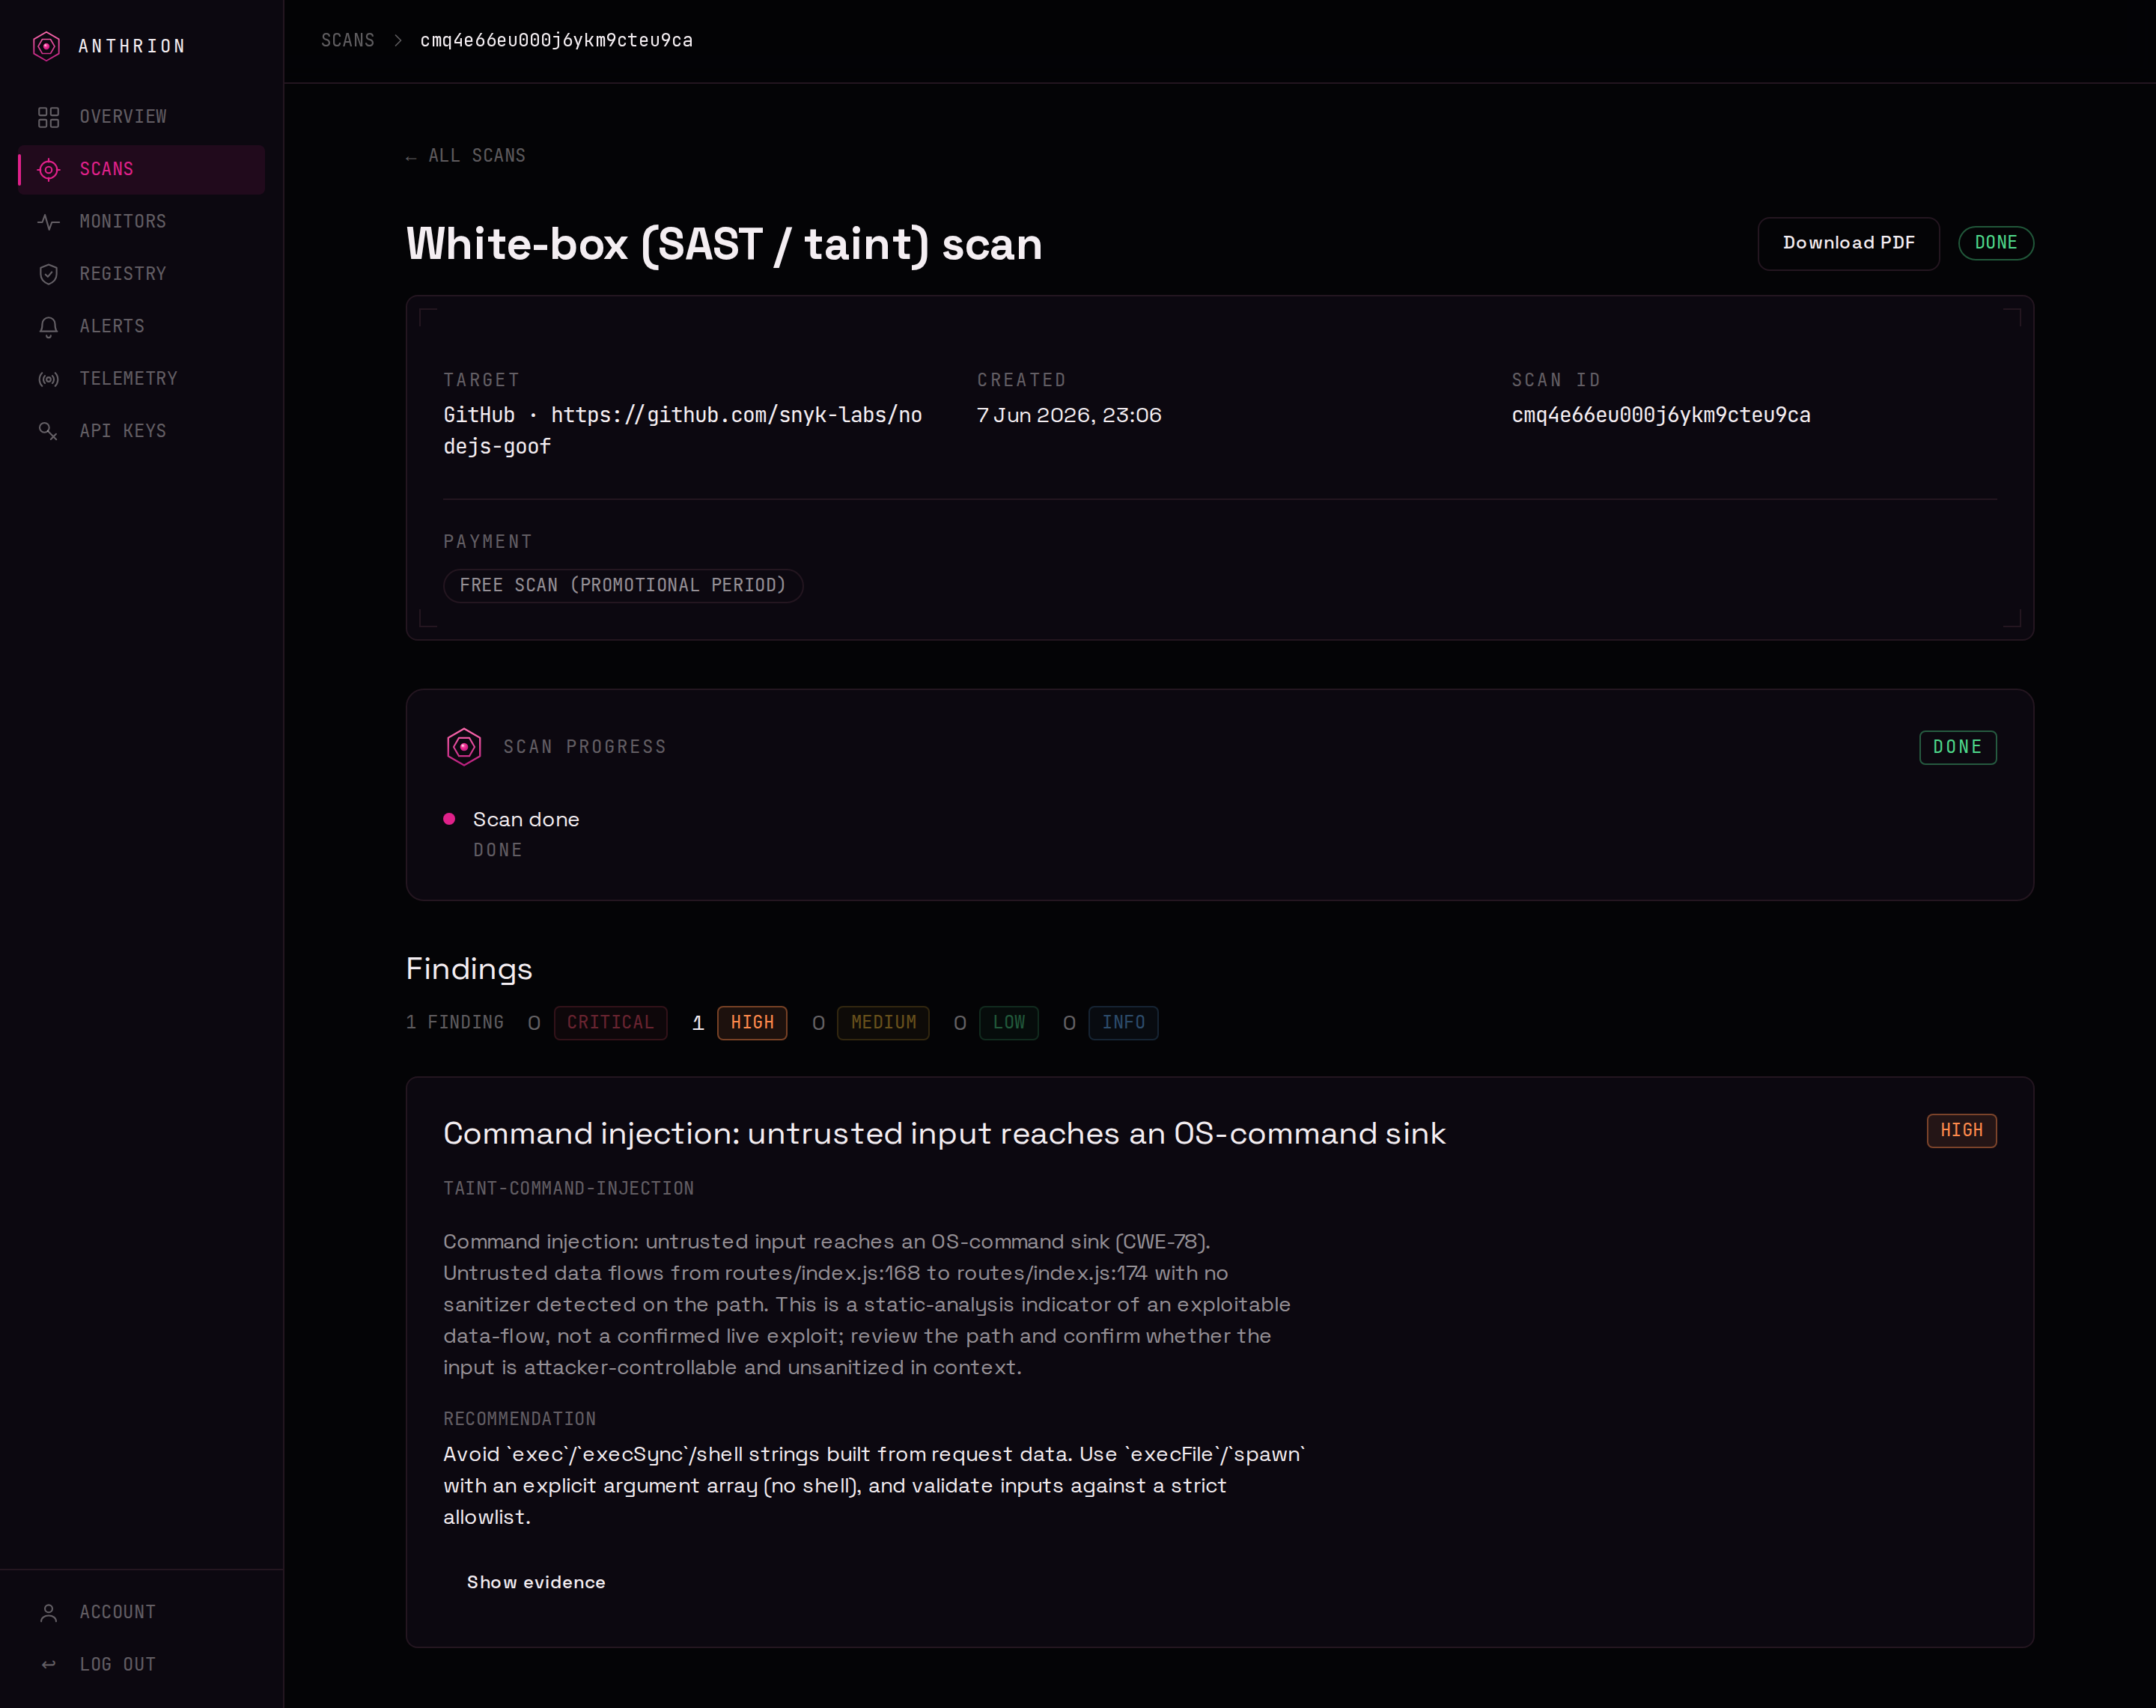
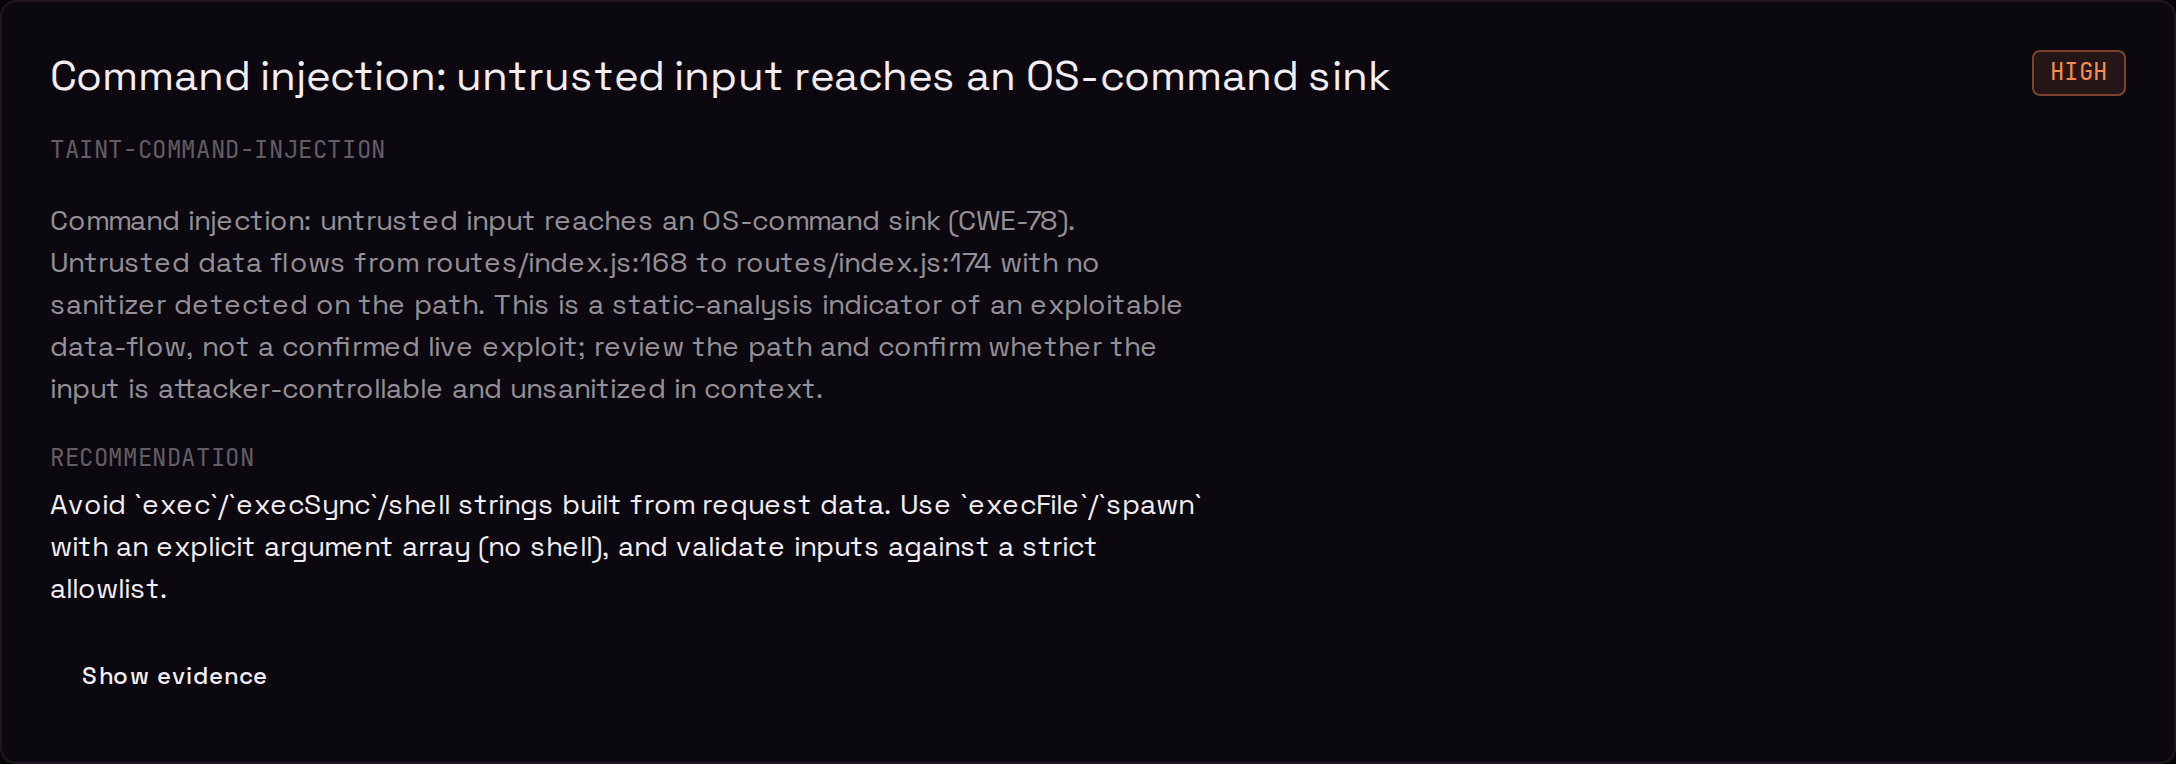
Open a finding to see the three things you act on:
- Severity — how urgent it is, from
CRITICALdown toINFO. - Evidence — the supporting detail: the exchange, request/response, or code path behind the finding, so you can confirm it for yourself.
- Recommendation — concrete guidance on how to fix it.
6. Download the report
Use Download report to save the report as a PDF — the same findings, evidence and recommendations in a shareable file you can hand to a teammate or attach to a ticket. Reports are private to your account.
Honesty
A scan is an indicator of risk, not a guarantee of security. A clean result means ANTHRION's checks did not surface a finding — not that the target is provably safe. Where a scan could only partially cover a target, the report says so rather than overclaiming.
What it costs
You pay per scan, in USDC — and during launch, scans are free. There is one free scan per wallet to start, no subscription, and no custody of your funds. Full pricing and on-chain payment details land under Pricing and Payments as they are finalized.
Next steps
- Browse every scan type and what it detects.
- Learn the finding model and severity scale the whole report is built on.
- Automate it: drive scans from the REST API, an agent over the MCP server, or your CI pipeline.